Google Jamboard is a digital whiteboard tool that’s part of Google Workspace (formerly G Suite). It lets teachers and students create, share, and collaborate on virtual “jams”—interactive whiteboard spaces where you can draw, write, add images or sticky notes, and brainstorm together in real time.
Jamboard works in any web browser and has apps for iOS and Android, so it’s easy to use whether you’re on a laptop, tablet, or phone.
Remote learning is challenging because it’s so easy to lose that sense of classroom energy and togetherness. Jamboard is a simple tool that helps bring some of that magic back.
It’s interactive—so it gets students involved, not just watching. It’s visual, so you can sketch, show relationships, and make abstract ideas more concrete.
And it’s collaborative—so everyone can contribute, just like passing a marker around the room. Teachers love using Jamboard for everything from warm-up questions to complex group projects. Students can brainstorm, share answers, and see their ideas build in real time.
Step 1: Accessing Google Jamboard
To get started, open your web browser and head to jamboard.google.com. If you’re already signed in to your Google account (like your school Gmail), you’ll land on the main Jamboard dashboard.
Here, you’ll see any boards you’ve worked on before. If it’s your first time, the space might be empty—but don’t worry, it’s about to fill up fast!
Alternatively, you can find Jamboard in your Google Drive. Click the “waffle” (the 3×3 grid of dots in the top-right corner) to open Google apps, then select Jamboard. On a tablet or phone, download the free Jamboard app from the App Store or Google Play.
Step 2: Creating a New Jam
Once you’re in, you’ll see a big orange plus sign in the bottom right—this is how you create a new Jamboard file (called a “jam”). Click it and you’ll get a fresh, blank board.
The first thing you’ll want to do is give your jam a name—click the “Untitled Jam” at the top and rename it to something like “Science Review – June 2025” or “Group Brainstorm Session.”
A jam isn’t just one page—it’s a collection of up to 20 “frames” (think slides or pages). You can add more frames as your lesson or project grows, so everything stays in one neat place.
Step 3: Exploring and Using the Tools
View this post on Instagram
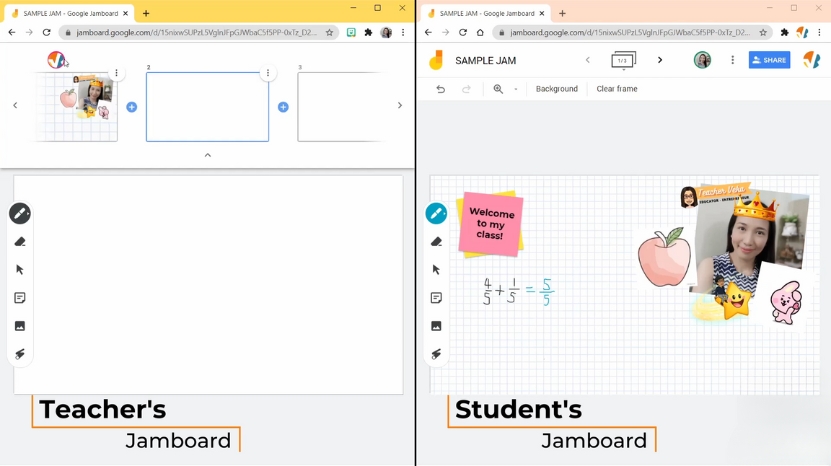
Along the left side, you’ll see Jamboard’s toolbox. Here’s how each tool can help in a real classroom:
- Pen, Marker, Highlighter, Brush: These let you write, doodle, circle answers, solve math problems, or underline important points. Students can use these to show their thinking or annotate text you’ve added.
- Eraser: Make a mistake? Just erase. Students can quickly clear their work if they want to try again.
- Select/Move Tool: Click the arrow to move sticky notes, shapes, or images around. Great for organizing group ideas or sorting information.
- Sticky Note: Click the sticky note icon, type your answer or idea, pick a color, and post it anywhere on the board. This is perfect for quick exit tickets, student responses, or group brainstorming.
- Add Image: Upload pictures, drag in screenshots, or even use Google Image Search right from Jamboard. Teachers can add diagrams, maps, or photos; students can add illustrations or visual examples.
- Shape Tool: Draw circles, rectangles, arrows, and more. Use shapes to highlight, sort, or build diagrams.
- Text Box: Add longer instructions, labels, or explanations that stay on the board for everyone to see.
- Laser Pointer: During live lessons, use the laser tool to point out key information—students see a temporary red “tail” following your mouse.
Spend a few minutes trying out each tool. There’s no “wrong” way—Jamboard is very forgiving, and you can always undo or delete as you go.
Step 4: Sharing Your Jamboard With Students
When your board is ready, it’s time to bring your students in. Click the bright yellow “Share” button in the top right corner. You’ll get a familiar Google sharing window (like Google Docs). Here, you can:
- Add specific student emails so that only they can access.
- Or, set the link so “Anyone with the link” can view or edit (if you want everyone collaborating).
Copy the link and share it however your class connects—Google Classroom, Zoom chat, email, or even a messaging app. On Zoom or Meet, you can open the Jamboard and screenshare as you work together, letting students write on it from their own devices at the same time.
Remember, you can control permissions: keep it “view only” if you just want students to watch, or allow editing so they can interact directly.
Step 5: Collaborate and Create—Jamboard in Action

Now for the fun part—collaboration! Invite students to join the Jamboard and give them a simple prompt to get started.
Maybe it’s “Write one thing you remember from last lesson,” “Add a sticky note with your hypothesis,” or “Sort these shapes into groups.”
As everyone adds their ideas, you’ll see the board fill up in real time.
Try using Jamboard for:
- Whole-class brainstorms
- Group mind maps
- Visual problem-solving (math or science)
- Interactive timelines or storyboards
- Labeling diagrams as a class
- Exit tickets or quick reflections at the end of a lesson
If students are shy, they can write or draw anonymously—no need to raise hands or turn on cameras. If you need more space, just add another frame. When you’re done, you can save the jam as a PDF to share or review later.
Tips for Success
- Set ground rules: Remind students to respect each other’s work—no erasing without permission!
- Assign roles: Give each group a task (note taker, presenter, timekeeper) to keep collaboration focused.
- Use color coding: Assign colors for different ideas, groups, or types of responses.
- Keep it simple: Don’t overload one board—use extra frames for big lessons.
Bottom Line
@edtechclass How to Use Google Jamboard during Morning Meeting #googlejamboard #googleedu #googleeducator #morningmeeting ♬ original sound – EdTech Classroom | Maddie
Google Jamboard is one of the easiest ways to make remote learning more interactive and personal. With just a few clicks, you can turn an ordinary lesson into a shared, creative space where every student has a voice, no matter where they are. It’s flexible, free, and simple enough for anyone to use.
Whether you’re teaching math, brainstorming for a project, or just checking in with your class, Jamboard helps you bring the energy and connection of a real classroom into your virtual world. If you’re looking for a tool that boosts engagement and brings your students together online, Jamboard is worth trying.